If you’ve been watching AI roll through the data community and thinking, “this seems useful, but I have no idea where to start,” this post is for you. If you have ethical objections to using AI, follow your convictions — this post isn’t here to convince you otherwise. My position these days is that AI use is inevitable in this industry, so I want to understand how to use it carefully and effectively while advocating for mitigation to the societal and environment damage that it causes. So if you’re curious, read on. Including AI in your Power BI development process doesn’t require a dramatic leap. It’s a progression. Start small, build confidence, add more capability when you’re ready.

I use examples from both Claude Code and Github Copilot in this post. I currently prefer Claude and Claude Code as my AI harness, but everything described here applies broadly to other generative AI tools. The principles are the same; only the menus change.

Before diving in: make sure you understand your organization’s policies around AI tool use. Even pasting a DAX measure or a data model description into a chat interface is sharing potentially sensitive business logic with an external service, and the concerns only grow as AI tools gain more direct access to your files and environment. The European Data Protection Board’s AI Privacy Risks and Mitigations in LLMs is a vendor-neutral reference for understanding what’s at stake, and worth a read before having that conversation with your security or compliance team.

Let’s walk through five stages, from a simple chat window to an AI-assisted workflow.

Note: Both AI tooling and Power BI capabilities evolve quickly. The specifics here are accurate as of June 2026, but some details may have changed by the time you’re reading this.

🐛 Crawl: Ask Questions in an AI Chat Interface

You open Claude, ChatGPT, or your preferred AI chat. You ask it a question. You use the answer.

This is the easiest place to start, and it can be genuinely useful. You’re not giving the AI access to your files or your environment; you’re just asking it things.

Some examples that may work well at this stage:

  • “How do I write a DAX measure that calculates rolling 12-month sales?”
  • “How do I build a small multiples chart in Power BI?”
  • “Why is my RANKX measure returning the same value for all rows?”
  • “Create a Power BI theme file that uses these hex colors: …”

You paste the DAX into Power BI Desktop yourself or follow the steps the AI outlines. The AI never touches your files; it’s just a resource you can query.
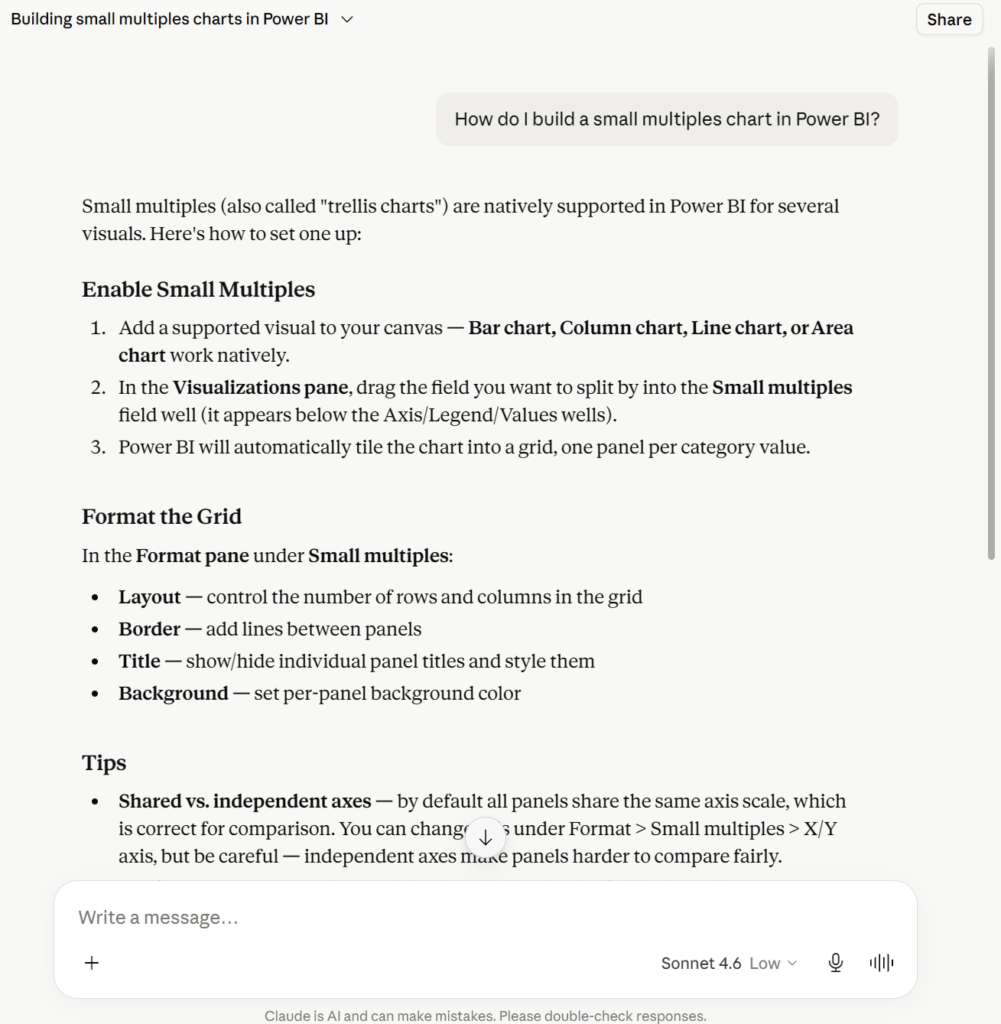
A screenshot of a Claude conversation titled "Building small multiples charts in Power BI." The user asked "How do I build a small multiples chart in Power BI?" and Claude responded with three sections: Enable Small Multiples (3 numbered steps covering adding a supported visual, dragging a field to the Small multiples well, and the automatic tiling result), Format the Grid (bullet points covering Layout, Border, Title, and Background options in the Format pane), and Tips (beginning with a note about shared vs. independent axes). The interface shows Sonnet 4.6 on Low usage at the bottom.
Using Claude chat in a browser window to answer a Power BI question

Always validate the output. AI is often wrong, particularly when it lacks context about your specific setup. It’s also non-deterministic: ask the same question twice and you may get a different answer. Test DAX measures against known values, verify steps actually exist in the UI, and don’t assume a confident-sounding answer is a correct one. Accuracy also varies with how you use the chat. Short, focused questions with fresh context tend to produce more reliable answers than long, winding conversations where the AI may lose track of earlier details or carry forward incorrect assumptions.

It’s worth starting here because it builds your intuition for how to prompt AI effectively. Learning to give clear context (“I have a fact table with a DateKey column and a Calendar table with a Date column joined on…”) makes a real difference in answer quality, and that skill pays off as you add more capabilities.

You’re ready for the next stage when you find yourself copy-pasting a lot, or wishing the AI could just see what you’re working with.

🚶 Walk: Bring AI Into Your Code Editor

You set up Visual Studio Code with an AI extension, open your Power BI project in PBIP format, and let the AI suggest or make changes, with your approval before anything is applied.
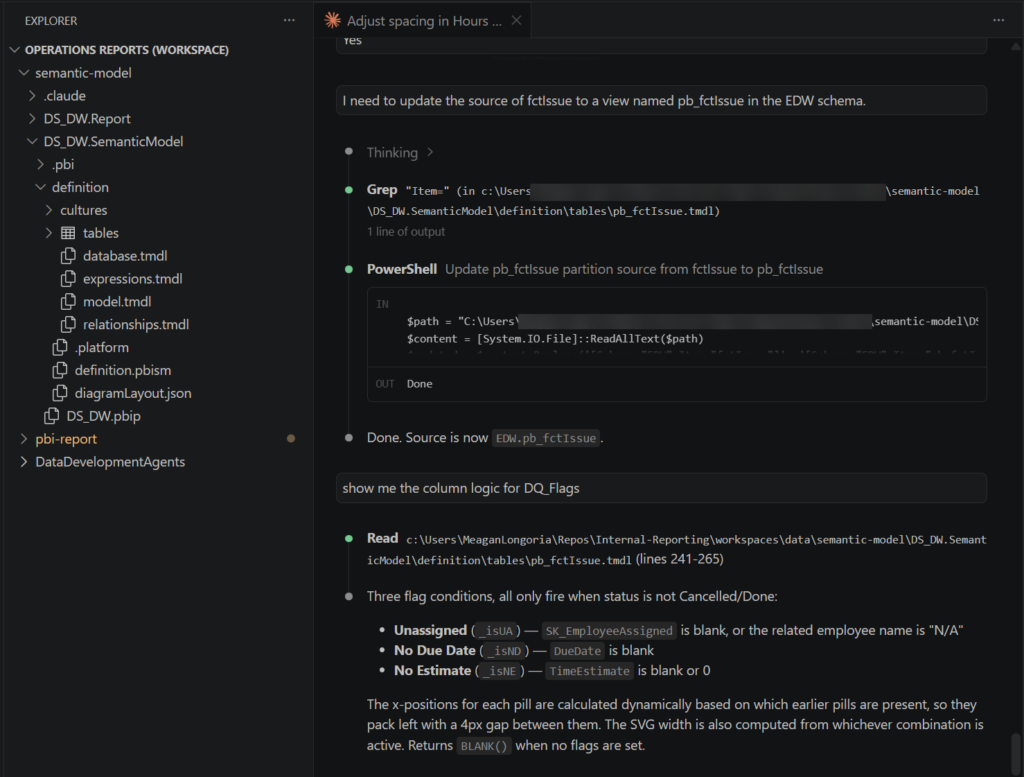
A screenshot of a dark-themed VS Code interface showing Claude Code running in a workspace. The left sidebar displays a Power BI project file structure (.pbip and .tmdl files). The main Claude Code pane shows a terminal-like conversation history where Claude has executed Grep and PowerShell tasks to update a semantic model table and is explaining the column logic for a data quality flag field
Using Claude Code in Visual Studio Code to update a semantic model

This is where things get a lot more powerful. A few important things to know:

You Need PBIP Format

Power BI Desktop’s default .pbix format is a binary file, so AI tools can’t read or modify it meaningfully. The PBIP (Power BI Project) format saves your report and semantic model as human-readable text files (TMDL for the model, PBIR-format JSON for the report). This is what makes AI-assisted editing possible.

To enable it: in Power BI Desktop, go to File > Options and settings > Options > Preview features and turn on Power BI Project (.pbip) save format.

AI Suggests, You Approve

In VS Code with an AI extension like GitHub Copilot or Claude Code, the AI proposes changes that you can review before accepting them. Nothing changes without your approval. Think of it this way: AI as a very fast first draft, you as the editor with final say.

This is also where planning mode is useful. Before writing a single line, you can ask: “I need to add a chart to the Sales Overview page showing which products have the highest gross margin this quarter.” The AI will lay out a plan; you can push back or refine it, then execute when you’re ready.

Tip: Give AI References

AI works much better when it has context. A few things worth providing:

  • Point the AI to your existing TMDL files so it can read your naming conventions, relationships, and calculation patterns directly from the model.
  • Link to the TMDL or PBIR schema documentation. Microsoft Learn has docs on TMDL and the PBIR report folder format, and pointing AI to the schema encourages it to avoid hallucinating property names.
  • Share a snippet from an existing report in PBIR format so the AI learns how you’ve structured visuals, pages, and filters.

The more context you give, the fewer iterations you need to achieve useful output. You’re ready for the next stage when you want the AI to do things autonomously — query documentation, check schemas, look things up — without you having to manually feed it everything.

🏃 Run: Add Skills and Connect to MCP Servers

You install skills and connect your AI harness to MCP (Model Context Protocol) servers, giving it purpose-built capabilities and the ability to take actions on your behalf.

Skills are packaged capabilities that teach the AI how to perform specific tasks. Your AI harness likely comes with some built-in skills, but they likely are not specific to Power BI. MCP servers connect your AI harness to external tools and live data. Together, skills and MCP servers let the AI do significantly more than suggest text in an editor.

Microsoft publishes Power BI-specific options for both. The report-focused skills — Power BI Report Authoring and Power BI Report Design — ship together in the Power BI authoring plugin from Microsoft’s Skills for Fabric catalog. For semantic model work, the Power BI MCP server connects the AI directly to your model.

Installing Skills and Connecting MCP Servers in VS Code

For GitHub Copilot CLI, skills are installed as plugins from a marketplace. To get the Power BI skills, first register the Microsoft Fabric marketplace, then install the authoring bundle:

/plugin marketplace add microsoft/skills-for-fabric
/plugin install powerbi-authoring@fabric-collection

Once installed, those skills are active in Copilot conversations in your project. No further configuration needed to start using them.

For MCP servers, VS Code with Copilot connects to them through a .mcp.json file in your workspace. The Power BI local MCP server runs on your machine and works with a running instance of Power BI Desktop, or with your PBIP files directly. The Power BI authoring plugin automatically registers the Power BI modeling MCP server on your machine.

If you don’t like the Microsoft-provided plugins (they are fairly new and still in preview), there are others available in the community.

Once skills and MCP servers are in place, the AI knows how to work with Power BI assets and has the tools to act. You spend less time explaining the territory and more time reviewing what it did.

The key difference from the previous stage: the AI has agency within the boundaries you set. It’s not just suggesting text; it’s taking steps in a workflow. That’s a lot more capability, and it’s worth being deliberate about what you let it do on its own.

Use Source Control

If you’re using PBIP format, your project files are plain text and work naturally with Git. This becomes especially valuable at this stage: you can have the AI commit its changes after each meaningful step, giving you a clean history you can roll back to if something goes wrong. Treating AI-assisted changes like any other code change — committed, reviewable, reversible — is one of the better habits you can build at this stage. If you struggle to understand Git, you can ask your AI harness to help you.

⚙ Customize: Add Your Own Instruction Files

You create markdown files that give your AI persistent, project-specific context about how you work: your conventions, your preferences, your patterns.

Most AI coding tools support some form of instruction file. In Claude Code, it’s CLAUDE.md. In GitHub Copilot, it’s custom instructions in settings. The format varies; the concept is the same.

For Power BI work, your instruction file might include things like:

  • Your DAX formatting preferences (line breaks, indentation, variable naming)
  • Your measure organization conventions (measure tables, display folders)
  • Your model naming standards (for example, human-readable table and column names over technical prefixes or source system names)
  • Design rules for your reports (color palette, font choices, no pie charts)
  • How your date table is structured and what the key columns are called
  • Links to your organization’s style guide or data dictionary

A good instruction file means fewer corrections and more outputs you can actually use.

Rather than putting everything into a single file, consider a lean primary instruction file that describes the project and references separate, focused files: one for DAX conventions, one for report design standards, one documenting your date table, and so on. In Claude Code specifically, this also takes advantage of how context is loaded: referenced files are only pulled in when relevant to the task at hand, rather than everything being loaded upfront. A single bloated instruction file consumes context window space on every interaction whether or not that content is needed. In GitHub Copilot, file inclusion is controlled by applyTo glob patterns in each instruction file, so you get similar control by scoping each file to the relevant context. The CLAUDE.md file can be created and edited manually or by the AI. Once it’s in your project root, the AI picks it up automatically on every interaction with that project.

⭐ Bonus: Turn Instructions Into Skills

You package your instruction content into a reusable skill that you can invoke across any project, not just the one where you wrote the file.

Skills are bundles of instructions that activate a specific capability or set of behaviors. Rather than copying your instruction file into every new project, you install the skill once and it’s available everywhere.

Why Skills Beat Generic MCP Servers for Personal Preferences

External MCP servers give your AI tools and data the ability to query an API, read a file, and fetch documentation. What they can’t give it is your preferences. An MCP server doesn’t know that you always put measures in a dedicated table, or that you prefer your cards to have a specific light gray background color, or that you never use the default blue theme.

Skills fill that gap. They capture the preferences and conventions that make your work yours.

A Real Example: Power BI Report Design Skill

I built a Power BI Report Design skill that I use across my projects. It contains:

  • Design guidelines: My preferred color palettes, typography choices, visual spacing rules, when to use which chart type, accessibility considerations
  • HTML mockup instructions: Detailed guidance for generating high-fidelity HTML mockups that closely reflect what’s actually achievable in Power BI Desktop, not idealized designs that look great in a browser but can’t be replicated in the tool

That last point matters more than it might seem. When you ask AI to design a report, it can easily generate beautiful HTML that would be impossible to build in Power BI Desktop: a fully custom tooltip on hover, pixel-perfect custom fonts, complex CSS animations. My skill steers the AI away from those dead ends and toward designs that translate cleanly into real Power BI visuals, formatting options, and layout constraints.

The skill also generates a Power BI theme file from the mockup, so the colors and typography translate directly into Desktop without manual configuration.

The result: mockups that set accurate expectations for stakeholders, designs I can actually build, and a theme file ready to apply. I drafted the original instruction files in Claude Desktop, had it package them into a skill, and installed it. Now I just invoke the skill to generate the HTML mockup and theme file.

🧱 Putting It Together

You don’t have to climb all five rungs at once. For many Power BI developers, the chat interface delivers real value without the file access risks that come with deeper integration. It’s not a compromise; it’s a real starting point. Master the first layer, and layer on the next when you find yourself bumping into its ceiling (and when you understand the risks and rewards of each step).

StageWhat You NeedWhat You Gain
Chat interfaceA browser or desktop application (Claude)On-demand expertise, no setup
VS Code + AI extensionVS Code, PBIP format, AI extensionAI sees your code, proposes diffs
Skills + MCP serversGitHub Copilot CLI, Claude Code, or similar harnessAI takes actions, queries live context
Instruction filesA markdown file in your projectAI learns your conventions
SkillsA skill file installed in your AI harnessReusable preferences across all projects

At every stage, you decide how much autonomy the AI has and what it has access to. Start where you’re comfortable and dial up the automation only as your trust and understanding of the tradeoffs grow.

The post Crawl, Walk, Run with Agentic Development of Power BI Assets first appeared on Data Savvy.
There is currently no way to set a default value in a Power BI slicer visual. If you create a report with a slicer for month and choose the current month (e.g. April 2026), save the report, and then come back to the report a month later, your original selection will be enforced and the data will now show the prior month. So how do you make reports with slicers show data for the current month by default while allowing users to select other months as needed? This video shows 3 options. My current personal favorite is the button slicer solution I show as the third option.

Setting page visibility and the active page are often overlooked last steps when publishing a Power BI report. It’s easy to forget the active page since it’s just set to whatever page was open when you last saved the report. But we don’t have to settle for manually checking these things before we deploy to a new workspace (e.g., from dev to prod). If our report is in PBIR format, we can run Fabric notebooks to do this for us. This is where Semantic Link Labs helps us.

You can download my notebook here. I’ll walk through the steps in this post.

Code Walkthrough

First, we must install semantic-link-labs. If you already have an environment with this library installed, you can use that and skip this step.

%pip install semantic-link-labs

Next, we need to import some modules.

# Imports
import sempy_labs as labs
from sempy_labs import report
import ipywidgets as widgets
from IPython.display import display

Then we can get to work. First, I’m capturing the following information using widgets: workspace ID, report ID, and page name.

w_workspace = widgets.Text( description = 'Workspace ID',style={'description_width': 'initial'}) 
w_report = widgets.Text(description = 'Report ID', style={'description_width': 'initial'})
w_activepage = widgets.Text(description = 'Active Page Name', style={'description_width': 'initial'})
display(w_workspace)
display(w_report)
display(w_activepage)

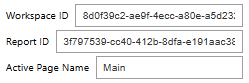
Running the code above will create 3 widgets. You will need to enter the required information into the widgets.

Fabric notebook widgets that capture workspace ID, report ID, and active page name

You could use variables in a cell to collect the required information. I’m using widgets to make it clear what information needs to be entered.

Once you have filled in the textboxes, you can run the last 2 cells. The fourth code cell is where I’m actually making the changes to the report.

var_reportname = labs.resolve_report_name(w_report.value, workspace=None)

var_rptw = labs.report.ReportWrapper(report=w_report.value, workspace=w_workspace.value,readonly=False)

var_rptw.set_active_page(w_activepage.value)
var_rptw.hide_tooltip_drillthrough_pages()
var_rptw.save_changes()

var_rptw.list_pages()

First, I use the report ID entered into the widget to get the report name.

Then I create my report wrapper (var_rptw). This object will be used with all the subsequent functions.

Next I set the active page to the page name entered into the w_activepage widget using the set_active_page() function. Then I call hide_tooltip_drillthrough_pages().

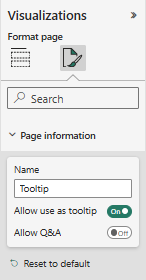
Each page has associated metadata that indicates whether it is a tooltip page and whether it is a drillthrough target page. I believe the tooltip page is determined by the page information setting labeled “Allow use as tooltip”.

Power BI page formatting options showing the Page information section containing the page name and the "allow use as tooltip" setting.
The Allow use as tooltip setting is in the Page information section

For drillthrough pages, I believe the presence of a field in the Drill through field well on the page is what causes it to be flagged as a drill through page.

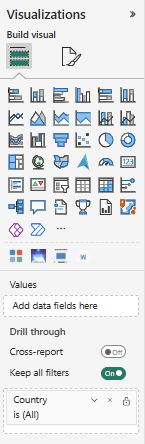
The Visualizations pane in Power BI showing a field populated in the drillthrough field pane.
The drill through fields are in the Visualizations pane when the page is selected.

Calling the set_active_page() and hide_tooltip_drillthrough_pages() functions changes the metadata for the report object, but we have to save the report changes back to the report in the target workspace, for the changes to take effect. This is why we call var_rptw.save_changes().

Once we save the changes, we get a response back that lists the changes made to the report.

🟢 The 'Main' page has been set as the active page in the 'DataSavvyReport2' report within the 'SempyLabsTest' workspace. 🟢 The 'Tooltip' page has been set to 'hidden' in the 'DataSavvyReport2' report within the 'SempyLabsTest' workspace. 🟢 The 'Drillthrough' page has been set to 'hidden' in the 'DataSavvyReport2' report within the 'SempyLabsTest' workspace. 🟢 The report definition has been updated successfully.
The output from calling save_changes() lists which page was set to active, which pages have been hidden, and a confirmation that the report definition was saved.

Calling list_pages() produces a pandas DataFrame with metadata for each page. We can refer to the Hidden, Active, Type, and Drillthough Target Page columns to confirm the desired changes.

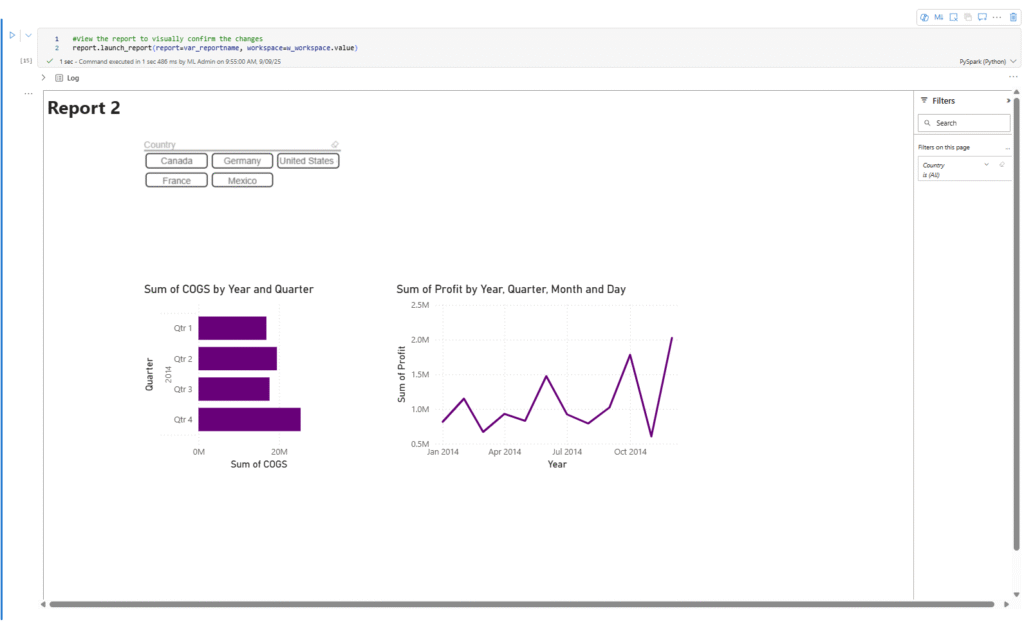
As a final confirmation, we can also view the Power BI report from within the notebook. That is what I’m doing with the launch_report() function. It provides a read-only view of the report in the notebook cell output..

Power BI report embedded in a notebook

More posts about Semantic Link Labs

So far, I’ve been exploring the report and admin subpackages of Semantic Link Labs. Below are some other blog posts I’ve written about them.

Finding fields used in a Power BI report in PBIR format with Semantic Link Labs

Get Power BI Report Viewing History using Semantic Link Labs

Want to learn more about Power BI Automation with Semantic Link Labs? Join our webinar this month covering this exact topic.

About ProcureSQL

ProcureSQL is the industry leader in providing data architecture as a service, enabling companies to harness their data and grow their business. ProcureSQL is 100% onshore in the United States and supports the four quadrants of data, including application modernization, database management, data analytics, and data visualization. ProcureSQL works as a guide, mentor, leader, and implementer to provide innovative solutions to drive better business outcomes for all businesses. Click here to learn more about our service offerings.

Do you have questions about leveraging AI, Microsoft Fabric, or the Microsoft Data Platform? You can chat with us for free one-on-one, or contact the team. We would love to share our knowledge and experience with you.

Lets talk about Images in PBIR and how to replace them.  With the PBIR format of Power BI reports, it’s much easier to make report updates outside of Power BI Desktop. One thing you may want to do is to switch out an image in a report. Maybe you need to rebrand a report, updating some of the images (logos and background images). You could import the images or use image URLs with DAX, but that comes with its own problems. If you have some dev ops or automation skills, this becomes pretty easy. Today, we will share an Data Architecture tip to get this done! When you insert an image into a report in Power BI Desktop, the original name of the image file is modified by adding a string of characters onto the end of the name. For a report in PBIR format, all images are placed into the <ReportName>.Report\StaticResources\RegisteredResources folder.
Screenshot of the RegisteredResourcesFolder in a PBIR format report containing 3 images
The RegisteredResources folder containing 3 images

Replacing an image with the same name

If you have the name of the file that is in the RegisteredResources folder, you can simply replace it with a file of the same name. This assumes the dimensions and resolution of the file are the same so it looks ok in the report. You could automate this in Azure DevOps pipelines or Github Actions, or just write a PowerShell script that checks out the branch in source control, replaces the image, and then checks it back in.

Replacing an image with a different name

If you need to replace the image file with a file that has a different name, there are more modifications to be done. The image file name is referenced in 2 files:
  • the report.json file for the report, found in the <ReportName>.Report\definition folder
  • the visual.json file for the visual that contains the image, found in the <ReportName>.Report\definition\pages\<PageName>\visuals\<VisualName> folder
Screenshot of the report.json folder showing the references to the 3 images from the RegisteredResources folder.
report.json file containing references to the image in PBIR files
You could delete the original image, add the new image with new file name, and then update the references in those two files. I’ve tested both ways using an Azure DevOps pipeline for automation. I added a step that runs a PowerShell script. Unless the image name is very important to you, I would just rename the new image to match the current image and avoid having to update the JSON files. The post Replacing Images in PBIR Format Reports first appeared on Data Savvy.

Have you ever wondered where a certain field is used in a report? Or maybe you need an easy way to find broken field references in a report? Certain 3rd-party tools such as Measure Killer and Power BI Helper (not updated recently) have helped us with this task in the past. But now we can perform this task with a notebook in Fabric! Lets take a look in this month’s Data Architecture tip.

This is made possible by the Semantic Link Labs Python library. Please note that PBIR format is still in preview at the time of publishing this blog post, so use it at your own risk. Also, this works only on reports published to the Power BI service. Since this notebook is not making any changes to the report, I feel it’s pretty safe to run, but do remember that it uses CUs on your Fabric capacity while you run it.

Using Semantic Link Labs with Power BI

To use the Semantic Link Labs package in your notebook, you need to install it and import the subpackages you need. You can also create an environment with Semantic Link Labs installed, and then you can skip the install step.

If you need to install and import, you would just write some Python like this:

%pip install semantic-link-labs

import sempy_labs as labs
from sempy_labs import report as rep
from sempy_labs.report import ReportWrapper

The important functions used in my field usage notebook are:

The list_semantic_model_objects function shows a list of all semantic model objects (measures, columns, hierarchies) that are used in a report and where the objects were used (i.e. visual, report filter, page filter, visual filter). It has a parameter that allows you to add an extra column that identifies whether the semantic model object used in the report exists in the semantic model which feeds data to the report.

The list_visuals function shows a list of visuals in a specified report.

I call these two functions and merge the results to give you a nice field usage list.

Using My Notebook

I created a notebook (download from Github here) that combines the Semantic Link Labs functions with some basic Python to allow you to do the following:

  • See a list of all fields and where they are used in a report
  • Search for a specific field to see where it is used in a report
  • Search for fields from a specific table to see where they are used in a report
  • Search for broken field references (i.e., the measure in the semantic model was renamed and the report was not updated)

You’ll find documentation and instructions at the top of my notebook to help you use it. First, read the documentation.

Then skip or run the install step as needed. Run the import step to get all the required libraries for the notebook to work.

The third code cell in my notebook creates some widgets to accept input for which report and fields you would like to search. You must enter at least the report name and workspace name. You may optionally specify a table name alone, or a table name and field name. By default, the notebook will look for all fields, whether they are valid or invalid (broken field reference). Change the selection if you would like to see only valid or only invalid.

The last cell of the notebook returns a table with the following columns:

  • Table Name – the table in which the field is located
  • Object Name – the field name
  • Object Type – indicates whether the field is a measure or column
  • Report Source – The part of the report in which the field is used (visual, report filter, etc.)
  • Report Source Object – The name of the object in which the field is used (usually the report name, page name, or visual name)
  • Valid Semantic Model Object – true/false as to if the field reference is valid
  • Page Name – unique ID of the page within the report where the field is used
  • Page Display Name – the page name you see in Power BI where the field is used
  • Visual Name – if the field is used in a visual, the unique ID of the visual where the field is used
  • Display Type – if the field is used in a visual, the type of visual where the field is used; e.g., Bar chart, Slicer, HTML Content (lite)
  • Visual Loc X – if the field is used in a visual, the x-coordinate of the visual
  • Visual Loc Y – if the field is used in a visual, the y-coordinate of the visual
  • Visual Loc Z – if the field is used in a visual, the z-order of the visual

If I have a report named WOW2024Wk37 and I want to see where all the fields in the __Measures table are used, I can enter that information and run the final cell.

the notebook widgets allow input for report, workspace, table, field, and invalid fields. The selection shows a report, workspace, and table entered. The field widget is blank, and invalid fields is set to all fields.

My results will help me see things like my [Color – CY] measure is used on the Sales Report page in a card, a bar chart, and a custom column chart. If I need to find the visual in the report, I can look at the x and y coordinates to give me an idea of where to look.

The results table in the notebook shows all 25 rows where fields from the __Measures table are used inn the selected report

Exploring Semantic Link Labs

I’m just getting into Semantic Link Labs, and I’m really enjoying the report package. I’m sure you’ll see more from me about this library as it is a great wrapper for easy access to Power BI APIs and a good way to automate the tasks of getting metadata and making updates in Power BI reports. If you are using Semantic Link Labs, I’d love to know what you are doing with it.

The post Finding fields used in a Power BI report in PBIR format with Semantic Link Labs first appeared on Data Savvy.